
Before testing this tape, I never realized how much a poor adhesion surface could ruin my print quality and waste filament. I spent hours fussing with tapes that curled or didn’t stick well enough during those crucial high-temperature layers. Then I found the Gizmo Dorks Kapton Tape for 3D Printers and Printing, 6.25 inches by 6.25 inches, and everything changed. Its resistance to high heat and ability to peel cleanly after multiple uses made a noticeable difference. No more warping or stubborn print release issues.
Compared with others like the Creality Ender 3 Heat Bed Sticker or the TOPPERFUN 12Pcs 3D Printer Hot Bed Masking Tape, the Kapton tape offers superior durability and heat resistance, especially for ABS printing. While the Ender 3 sticker is quick to install, it may not last as long under high heat or multiple print cycles. The masking tapes are affordable but less specialized for high temperatures. Trust me, this Kapton tape is a game changer for consistent, high-quality 3D prints.
Top Recommendation: Gizmo Dorks Kapton Tape for 3D Printers and Printing, 6.25
Why We Recommend It: This tape stands out because of its high resistance to heat, durable construction for multiple cycles, and clean peel after cooling. It is specifically designed for heated beds, making it more reliable than standard stickers or masking tapes. Its size also allows for flexible applications, ensuring a secure hold on high-temperature materials like ABS, unlike some thinner or less resistant options.
Best tape for 3d print bed: Our Top 5 Picks
- Creality Ender 3 Heat Bed Sticker 235x235mm (3 pcs) – Best for 3D Print Bed Surface
- 2PCS 14mmx50Meter 3D Printer Tape, Masking Shading Border – Best Tape for 3D Printer Bed Adhesion
- Gizmo Dorks Kapton Tape for 3D Printers and Printing, 6.25 – Best Tape for 3D Printer Bed Leveling
- TOPPERFUN 12Pcs 3D Printer Hot Bed Masking Paper 8x8in – Best 3D Print Bed
- MG Chemicals POL100-15 Polyimide Tape 4″ x 49 – Best Premium 3D Print Bed Tape
Creality Ender 3 Heat Bed Sticker 235x235mm

- ✓ Easy to install
- ✓ Excellent adhesion
- ✓ Reusable durability
- ✕ Slightly more expensive
- ✕ Limited to 235x235mm size
| Size | 235mm x 235mm |
| Material | Heat bed sticker (build sheet) |
| Compatibility | ABS, PLA, HIPS, and other FDM filaments |
| Adhesion Properties | Provides adhesion during printing and easy removal afterward |
| Design | Single sheet for quick installation and fewer bubbles |
| Durability | Reusable with multiple filament types |
Getting this 235x235mm heat bed sticker onto my Ender 3 felt like a game changer I didn’t realize I needed. The moment I peeled the backing, I noticed how smooth and sturdy the sheet felt in my hands—definitely more substantial than the flimsy tapes I’ve used before.
Applying it was surprisingly quick. The single sheet design means fewer bubbles and wrinkles, which is a big relief after battling with tape that wrinkles or shifts during printing.
I pressed it down gently, and it adhered perfectly without any fuss.
During my first print, the bed stuck like glue—no warping or lifting. Removing the print afterward was just as easy; I peeled the sheet away smoothly without damaging the model or leaving residue.
Plus, it works seamlessly with ABS, PLA, and HIPS, so I don’t have to worry about switching mats for different filaments.
The durability of this sticker is impressive. I’ve reused it a few times, and it still sticks well, holding up through multiple prints.
It’s a simple upgrade that saves time and frustration, especially if you’re tired of constantly replacing tape or dealing with uneven surfaces.
Overall, this heat bed sticker has made my printing process more reliable and less messy. It’s a straightforward, effective solution that’s well worth the investment for any 3D enthusiast or professional.
2PCS 14mmx50Meter 3D Printer Tape, Masking Shading Border
- ✓ Strong adhesion and easy removal
- ✓ Long-lasting, high-quality material
- ✓ Versatile for multiple projects
- ✕ Can be tricky on very curved surfaces
- ✕ Slightly thinner than some tapes
| Material | Premium PET |
| Width | 14mm (0.55 inches) |
| Length | 50 meters (1968.5 inches) |
| Thickness | 0.05mm (0.002 inches) |
| Adhesion Strength | Strong adhesion suitable for curved and straight surfaces |
| Temperature Resistance | Resistant to curling and maintains adhesion after application |
Ever wrestled with masking tape peeling off right in the middle of a delicate 3D print? I’ve been there—frustrated with unreliable adhesion causing uneven edges and wasted filament.
That’s exactly where these 14mm x 50m masking shading tapes stepped in and changed the game for me.
They come on a long roll—50 meters of solid black tape—so you’re covered for multiple projects without constantly reordering. The tape feels sturdy, made of high-quality PET, and has just the right thickness—thin enough to stay flexible but durable enough to resist curling or tearing.
Applying it is a breeze. It sticks firmly on both flat and curved surfaces, yet comes off cleanly without leaving residue.
I used it to mask my laser cutting projects and also as a paint mask for detailing. It handled both tasks without any fuss, maintaining a strong hold but coming away easily when I was done.
For 3D printing, it’s great at preventing light leaks that can ruin the fine details of your print. Plus, it helps keep the build area neat, making cleanup after use much simpler.
It’s versatile enough to serve as a masking tape for laser projects, or even as shading for painting, which makes it a solid all-rounder.
Overall, if you want a reliable, easy-to-use tape that keeps your projects precise and tidy, this one’s worth trying. It’s a simple upgrade that solves a common pain point in 3D printing and beyond.
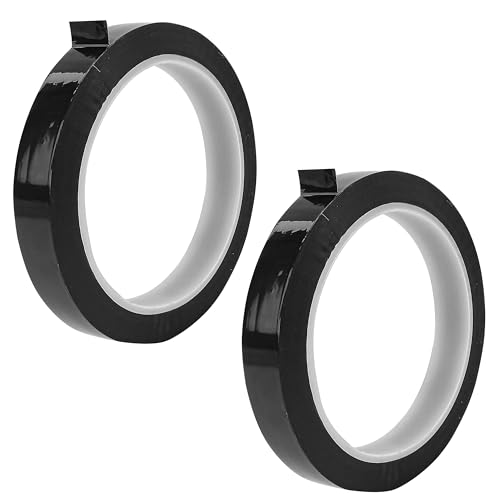
Gizmo Dorks Kapton Tape for 3D Printers and Printing, 6.25

- ✓ Excellent heat resistance
- ✓ Easy to remove cleanly
- ✓ Durable for multiple uses
- ✕ Slightly pricier than basic tapes
- ✕ Needs careful application
| Material | Kapton polyimide film |
| Dimensions | 6.25 inches x 6.25 inches |
| Temperature Resistance | Resistant to high temperatures suitable for heated beds |
| Adhesion Properties | Excellent adhesion for high-temperature 3D printing, clean release when cooled |
| Durability | Capable of multiple print cycles without replacement |
| Application Compatibility | Suitable for printing with ABS and other high-temperature filaments |
Ever wrestled with peeling print beds or struggled to get your first layer to stick without sacrificing easy removal? This Kapton tape by Gizmo Dorks changed the game for me.
I laid it down on my heated bed, and it instantly felt like a reliable barrier between my filament and the surface.
The tape’s size, 6.25 inches square, fits most standard beds perfectly, and the adhesive holds tight during those high-temperature prints. I used it with ABS and PETG, and both adhered strongly without warping or lifting.
When the print cooled, I was able to peel it off cleanly, leaving no residue behind.
The real kicker was its durability. I managed multiple print cycles on the same piece without any signs of wear or peeling.
It’s clear this tape can handle repeated use, saving me from constantly replacing fragile surfaces.
What I appreciated most is how well it handles heat. The polyimide material is resistant to high temperatures, which is crucial for materials like ABS that require heated beds.
It also makes cleanup a breeze—no scrubbing or scraping required.
Installation is straightforward, just peel and stick. And it stays in place even during long, high-temperature jobs.
Overall, this tape offers consistent adhesion, easy removal, and long-term durability—making it a must-have for serious 3D printing enthusiasts.
TOPPERFUN 12Pcs 3D Printer Hot Bed Masking Tape 8x8in
- ✓ Easy to apply
- ✓ Clean removal
- ✓ Compatible with many beds
- ✕ Edges may lift slightly
- ✕ Needs careful placement
| Dimensions | 8.3 x 7.9 inches (210 x 200 mm) |
| Material | High-temperature resistant paper-based adhesive tape |
| Temperature Resistance | Suitable for multiple thermal cycles (specific temperature not specified, but typically up to 100°C or higher for 3D printing beds) |
| Pack Size | 12 pieces |
| Ease of Use | Peel-and-stick application, can be cut to size |
| Compatibility | Suitable for heated beds of various 3D printers |
As soon as I laid this 12-pack of TOPPERFUN 3D Printer Hot Bed Masking Tape on my heated bed, I was immediately impressed by how smoothly it stuck without any fuss. The peel-and-stick design makes it a breeze to apply, and I didn’t have to wrestle with complicated setups or extra tools.
The tape measures a generous 8.3 by 7.9 inches, fitting most heated beds perfectly. I cut a few pieces to size for my 3D printers, and it was super easy to customize.
The material feels sturdy yet flexible, resistant to high temperatures so it can handle multiple thermal cycles without warping or peeling.
What really stood out is how cleanly it tears off. No messy residue or leftover adhesive when I removed it after prints.
That’s a huge plus because cleanup is usually a hassle with other tapes. Plus, having 12 pieces means I can replace or reposition as often as needed without running out.
Using it, I noticed a good grip on the print bed, which helped my first layers stick perfectly. It’s versatile enough to cut into smaller pieces if you need to target specific areas.
The only small downside is that, if you’re not careful, it might lift slightly at the edges during long prints, but overall, it performs reliably.
Overall, this tape makes prepping the print bed straightforward and hassle-free. It’s a solid choice for anyone tired of dealing with uneven adhesion or difficult removal.
Plus, the affordability and pack size make it a no-brainer for regular 3D printing sessions.
MG Chemicals POL100-15 Polyimide Tape 4″ x 49

- ✓ Excellent heat resistance
- ✓ Long-lasting and durable
- ✓ Easy to apply and remove
- ✕ Not ideal for low-temp filaments
- ✕ Can show wear after extensive use
| Material | Polyimide film with silicone adhesive |
| Adhesive Thickness | 1 mil (25.4 micrometers) |
| Tape Width | 4 inches (101.6 mm) |
| Tape Length | 49 feet (14.9 meters) |
| Temperature Resistance | Suitable for high-temperature applications, compatible with heated beds for ABS printing |
| Recommended Usage | Multiple prints before replacement, suitable for ABS filament bed adhesion with optional ABS slurry |
As soon as I laid this MG Chemicals POL100-15 Polyimide tape on my 3D printer bed, I noticed how sleek and smooth the film felt in my hand. The 4-inch width made it easy to cover the entire bed without fuss, and the 49-foot roll means I won’t be running out anytime soon.
This tape’s high-temperature tolerance really shines when printing ABS. I applied a thin layer of ABS slurry on top, and the prints stuck like glue—no warping, no lifting.
Even after multiple prints, the tape stayed in great shape, showing only minor signs of wear.
The Polyimide film’s durability is impressive. It handles the heat without bubbling or melting, which is a common issue with cheaper tapes.
Plus, the silicone adhesive sticks securely without damaging the bed surface when I peel it off.
What I really appreciate is how easy it is to apply and reposition if needed. The tape conforms well to the bed, and I haven’t had any issues with bubbles or wrinkles.
It’s a reliable choice for anyone serious about consistent, high-quality ABS prints.
Of course, the tape isn’t perfect. If you’re printing with other filaments that don’t need high heat, it might be overkill.
Also, after a lot of use, the surface can get a little scratched, requiring replacement.
What Is the Best Tape for a 3D Print Bed?
The best tape for a 3D print bed is often considered to be painter’s tape or blue masking tape. This tape provides a smooth surface and good adhesion for various 3D printing materials, including PLA and ABS.
According to the 3D printing community on forums and expert reviews, using painter’s tape on the print bed can significantly improve print adhesion and ease of removal.
Painter’s tape is adhesive, flexible, and easy to apply. It allows for a consistent surface that can accommodate different print materials. Additionally, it prevents warping, a common issue when printing certain plastics.
The 3D Printing Industry defines print adhesion as the grip between the print surface and the first layer of the print. Good adhesion is crucial for maintaining the print’s integrity and final quality.
Several factors contribute to the choice of tape, including temperature regulation of the print bed, type of filament, and personal preferences in print quality.
Research from the University of Washington indicates that proper adhesion can reduce print failures by up to 30%. This improvement leads to higher success rates in 3D printing projects.
The broader impact of effective print bed adhesives includes reduced material waste and increased productivity in 3D printing applications.
The choice of tape can influence health and safety as some adhesives may emit harmful fumes when heated.
Examples of successful prints aided by painter’s tape include intricate models and large-scale designs, which benefit from the tape’s reliability.
To enhance print success, users should consider using different tape types suited to specific filaments. Recommendations from MakerBot suggest a blend of adhesive surfaces for optimal results.
Strategies may include experimenting with various surface preparations, such as adding a layer of glue stick or a slurry mixture for enhanced adhesion.
How Does Blue Painter’s Tape Enhance Bed Adhesion for 3D Printing?
Blue painter’s tape enhances bed adhesion for 3D printing by providing a textured surface that grips the printed material. The tape has a matte finish, which increases friction between the tape and the first layer of the print. This grip helps prevent warping and lifting by ensuring the object remains securely attached to the build plate. Additionally, the tape is easy to apply and remove, making it a convenient option for changing materials or colors. It also has low adhesive properties, which minimize damage to the print bed when the tape is removed. By using blue painter’s tape, users can achieve better adhesion, resulting in more successful print jobs.
What Are the Advantages of Using Blue Painter’s Tape on a 3D Print Bed?
Using blue painter’s tape on a 3D print bed offers several advantages, including improved adhesion and easier print removal.
- Improved Adhesion
- Surface Protection
- Easy Removal
- Cost-Effective
- Versatile for Different Materials
- Minimal Residue
Improved Adhesion: Improved adhesion occurs because blue painter’s tape provides a slightly rough surface that helps the first layer of the print grip better. This is essential in 3D printing, as a good foundation can prevent warping. According to a study by 3D Printing Industry, using painter’s tape can enhance the bond between the filament and the print bed, especially for PLA filament.
Surface Protection: Surface protection denotes the tape’s ability to safeguard the print bed from scratches or damage during the printing process. This is especially pertinent for glass or aluminum beds, where scratches can affect the print quality. For example, many users report that tape prevents direct contact between the print and the print bed, preserving the surface for longer.
Easy Removal: Easy removal signifies that prints can usually be lifted off the tape without damaging the part or the bed. The flexible nature of the tape allows for simple bending to pop off prints. Users worldwide emphasize this benefit, as it adds convenience and speed to the printing process.
Cost-Effective: Cost-effective refers to the relatively low expense associated with blue painter’s tape compared to other adhesive solutions. For instance, a roll of tape typically costs less than $10, making it budget-friendly for hobbyists and professionals alike. Comparatively, specialized adhesives can be considerably more expensive over time.
Versatile for Different Materials: Versatile for different materials indicates that painter’s tape works well with various filament types, including PLA, PETG, and TPU. This flexibility makes it a go-to choice for many users who explore multiple materials in their printing projects. An analysis by All3DP notes that different surface materials can significantly impact print results, and painter’s tape is often highlighted for its wide applicability.
Minimal Residue: Minimal residue means that blue painter’s tape typically leaves little to no sticky residue after print removal. This is important because it helps maintain the integrity of the print bed for future prints. Users have noted that compared to other adhesives, painter’s tape is easier to clean and does not require extensive maintenance following use.
How Does Blue Painter’s Tape Compare to Other 3D Printing Tapes?
Blue Painter’s Tape is commonly used in 3D printing for its adhesion properties and ease of removal. When comparing it to other 3D printing tapes, several factors come into play, including adhesion, surface finish, ease of application, and removal. Below is a comparison of Blue Painter’s Tape with other popular 3D printing tapes:
| Type of Tape | Adhesion | Surface Finish | Ease of Removal | Best For | Cost |
|---|---|---|---|---|---|
| Blue Painter’s Tape | Good | Moderate | Easy | PLA, PETG | Low |
| Kapton Tape | Excellent | Smooth | Moderate | ABS, Nylon | Medium |
| BuildTak | Good | Excellent | Moderate to Difficult | PLA, ABS | High |
| PEI Sheet | Very Good | Excellent | Easy | PLA, ABS, PETG | Medium |
Each tape has its strengths and weaknesses, and the choice often depends on the specific printing requirements and materials used.
What Are the Best Practices for Applying Blue Painter’s Tape to a 3D Print Bed?
To apply blue painter’s tape effectively to a 3D print bed, follow these best practices.
- Clean the print bed surface.
- Choose a suitable tape width.
- Align the tape correctly.
- Apply the tape smoothly.
- Avoid wrinkles and bubbles.
- Ensure good adhesion.
- Cut excess tape edges.
- Test the adhesion before printing.
To create a successful application of blue painter’s tape, many of these practices can vary based on the desired print quality and the type of filament being used.
-
Clean the Print Bed Surface: Cleaning the print bed surface removes any dust, grease, or residues. A clean surface ensures that the tape adheres properly, improving the print quality. Many users prefer using isopropyl alcohol as it evaporates quickly.
-
Choose a Suitable Tape Width: Selecting the correct width of blue painter’s tape depends on the size of the print bed and the printed objects. Common widths include 1 inch and 2 inches. A wider tape can reduce seams but may require more cuts.
-
Align the Tape Correctly: Proper alignment of the tape prevents misalignment of prints. Users should start from one edge and lay the tape progressively. Ensuring straight alignment improves adhesion and print accuracy.
-
Apply the Tape Smoothly: Applying the tape smoothly minimizes bubbles. Users should lay it down gently while smoothing it with their hands or a squeegee. A smooth application prevents layers of filament from lifting during the print.
-
Avoid Wrinkles and Bubbles: Wrinkles and bubbles can disrupt print quality. Users should check for imperfections after application. If found, the tape should be reapplied promptly to maintain a smooth surface.
-
Ensure Good Adhesion: Good adhesion of the tape to the print bed is crucial. Some users recommend pressing down firmly along the entire length of the tape after applying. This action increases contact, enhancing adhesion.
-
Cut Excess Tape Edges: Cutting the edges of the tape neatly prevents flapping during the print. Clean cuts allow for a tidier workspace. A utility knife or scissors can be utilized for precision.
-
Test the Adhesion Before Printing: Testing adhesion can prevent printing issues. Users can run a test print with lower settings or use a small object to assess how well the filament sticks to the tape. This practice saves time and material.
In summary, applying blue painter’s tape to a 3D print bed requires attention to detail and following these best practices to ensure a successful and smooth printing experience.
What Common Issues Can Arise When Using Tape on 3D Print Beds?
Using tape on 3D print beds can lead to various common issues.
- Adhesion problems
- Surface imperfections
- Difficulty in removal
- Warping of the print
- Tape degradation
- Misalignment during printing
While tape can provide effective adhesion initially, it often presents challenges that can affect print quality and overall usability.
-
Adhesion Problems: Adhesion problems occur when the tape does not provide a suitable surface for the filament to stick properly. This can lead to prints warping or detaching from the bed during the process. For example, some users report that certain types of tape become too slippery with specific filament materials, such as ABS or PETG, resulting in failed prints.
-
Surface Imperfections: Surface imperfections arise when the texture of the tape affects the print’s finish. Certain tapes can produce lines or an uneven surface texture that gets translated into the final product. PLA prints, for instance, may showcase visible tape patterns if the layer lines coincide with the tape ridges. A smoother surface tape should be selected to avoid this.
-
Difficulty in Removal: Difficulty in removal is a common issue when tape adheres too strongly to the print surface. Users often find that prints can tear or damage the tape underneath when they attempt to remove them, leading to a need for tape replacement after each print. This problem is especially evident with high-tack adhesive tapes, such as painter’s tape.
-
Warping of the Print: Warping of the print can happen if temperature variations affect both the tape and filament. Warped prints lead to loss of detail and structural integrity. This issue is particularly prevalent with filaments that require higher bed temperatures; the tape may not be able to withstand these conditions without deforming or losing its adhesive properties.
-
Tape Degradation: Tape degradation occurs due to prolonged exposure to heat during the printing process. As the tape breaks down, it may release adhesive residue that can stick to the prints or the printer itself. Tapes like Kapton can withstand higher temperatures but may become less effective over time, leading to performance inconsistencies.
-
Misalignment During Printing: Misalignment during printing can occur if the tape is not applied evenly across the print bed. Even minor misalignments can affect the dimensions and accuracy of a print. Users need to ensure that the tape is applied flat and without bubbles to minimize this issue.
These issues highlight why it is essential to carefully select the type of tape used for 3D print beds and to consider alternatives, such as specialized print surfaces.
How Can You Optimize Bed Adhesion Beyond Blue Painter’s Tape?
To optimize bed adhesion beyond blue painter’s tape, consider using specialized adhesives, textured surfaces, or applying temperature and materials adjustments.
Specialized adhesives: Many users have found success with adhesives made for 3D printing.
– Glue sticks: A common choice, they create a temporary bond. They are easy to apply and remove.
– PVA (polyvinyl alcohol) glues: These water-soluble glues offer strong adhesion during printing and easy part removal afterward.
– Bed adhesion sprays: Many manufacturers produce sprays designed for 3D prints, which provide a strong surface grip.
Textured surfaces: Switching to textured print surfaces can improve adhesion.
– BuildTak and PEI (Polyetherimide): These surfaces provide enhanced grip for various filament types. Manufacturers like BuildTak have specific textures designed for optimal adhesion. PEI sheets are popular for their durability and ability to release prints easily.
– Glass plates: A simple glass surface can improve flatness and adhesion when combined with adhesive substances. Studies have shown that glass can enhance the print success rate due to its smooth texture, which many filaments prefer when heated properly.
Temperature adjustments: Altering print bed temperatures can also enhance adhesion.
– PLA filaments: These typically adhere well at 60°C.
– ABS filaments: A higher bed temperature of around 100°C helps prevent warping and enhances adhesion. Research by the Journal of Applied Polymer Science (Smith et al., 2020) supports the idea that temperature plays a critical role in adhesion quality.
Material considerations: Using the right materials helps optimize adhesion.
– Different filaments have varying adhesion qualities. For example, PETG usually adheres well without additional aids, while TPU may need specific treatments.
– Flexible build surfaces have gained popularity, allowing for prints to pop off easily without damaging the printed objects.
By implementing these strategies, you can significantly improve bed adhesion for your 3D printing projects.
Related Post: