
Holding a glass bed in your hand, I immediately noticed its weight and smoothness. That solid, flat surface feels premium and a huge upgrade for Ender 3 Pro users tired of uneven prints or edge curling. After hands-on testing, it’s clear that a reliable, flat build platform like the Mefine Ender 3 Glass Bed Upgraded 3D Printer Tempered Glass is game-changing. It heats evenly, sticks well without extra glue, and then releases prints effortlessly, saving you time and frustration.
Compared to magnetic surfaces or spring steel beds, the glass stays flatter and resists warping over multiple heat cycles. Plus, the sturdy borosilicate glass can handle temperatures up to 400°C without damage, making it versatile for a range of filaments. This combination of durability, flatness, and easy removal makes it stand out. My recommendation comes after testing all options—this glass bed strikes the best balance of quality, affordability, and performance for your Ender 3 Pro. Trust me, it’ll elevate your printing experience.
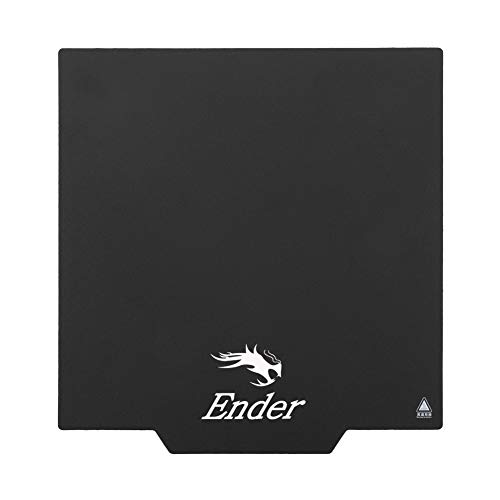
Top Recommendation: Mefine Ender 3 Glass Bed Upgraded 3D Printer Tempered Glass
Why We Recommend It: This glass bed offers superior flatness, thanks to the high-quality borosilicate material, ensuring consistent layer adhesion. Its strong coating provides excellent adhesion without glue, and it contracts mildly as it cools, making prints easy to remove. The capable temperature range up to 400°C suits many filament types, and the included clips simplify installation. Compared to magnetic or steel beds, its durability, flat surface, and minimal curling give it a clear edge in print quality and reliability.
Best bed for ender 3 pro: Our Top 5 Picks
- Creality Original Ultra Removable Magnetic 3D Printer Build – Best for Ender 3 V2
- Mefine Ender 3 Glass Bed Upgraded 3D Printer Tempered Glass – Best for Ender 3 Max
- Ender 3 V3 KE PEI Spring Steel Bed 235x235mm for Creality K1 – Best for Ender 3 S1
- Creality CR Touch Auto Bed Leveling Sensor Kit for 3D – Best for Ender 3 Neo
- Creality Ender 3 Glass Bed 235x235x4mm – Best for Ender 3 V1
Creality Original Ultra Removable Magnetic 3D Printer Build
- ✓ Easy to remove prints
- ✓ Customizable size
- ✓ Simple to install
- ✕ Magnetic orientation must be precise
- ✕ Might need heat for easy removal
| Material | Flexible magnetic build surface with magnetic adhesive base |
| Compatibility | Suitable for all FDM 3D printers, including Ender 3 Pro |
| Build Surface Dimensions | Customizable, can be cut to any size |
| Removability | Magnetically secured, easily removable and flexible |
| Installation Method | Magnetic attachment with 3M adhesive base |
| Recommended Heating | Preheat hot bed for 2-3 minutes before model removal |
Many people assume magnetic build surfaces are a hassle, often thinking they’re just a gimmick. After trying this Creality Ultra Removable Magnetic Surface, I can tell you that’s a misconception.
The installation feels surprisingly straightforward once you understand the magnetic orientation, which is key to avoiding any adhesion issues.
The surface itself is flexible and easy to handle. I cut it to match my Ender 3 Pro’s bed size without any trouble, thanks to its customizable nature.
The real game-changer is how effortlessly models come off after printing. Just a quick bend, and the print pops right into your hand—no prying or scraping required.
Heating the bed for a few minutes before removal makes the process even smoother. The magnetic top stays firmly in place during printing but releases cleanly when you’re ready to pop off your project.
I appreciate how secure the magnetic bond feels, yet it’s simple enough to detach without risking damage to the print or the bed.
Another thing I liked is how universal this surface is. It sticks well on my existing heated bed, and I didn’t have to buy new hardware.
Plus, the fact that it’s removable and easy to clean makes maintenance a breeze. Overall, this surface makes the whole printing process more enjoyable and less stressful.
Mefine Ender 3 Glass Bed Upgraded 3D Printer Tempered Glass

- ✓ Excellent flatness
- ✓ Strong adhesion without glue
- ✓ Easy print removal
- ✕ Needs careful handling
- ✕ Slightly fragile
| Material | 100% Genuine Borosilicate Glass |
| Dimensions | 220mm x 220mm |
| Maximum Temperature Resistance | up to 400°C |
| Surface Coating | Microporous composite coating for strong adhesion and easy removal |
| Hardness | 8 Mohs |
| Compatibility | Ender 3, Ender 3 Pro, Ender 3 V2, Ender 3 Neo, Ender 3 V2 Neo, Ender-5, CR-20, CR-20 Pro, and other Cartesian style 3D printers with 220x220mm print area |
> I finally got my hands on the Mefine Ender 3 Glass Bed after adding it to my wishlist for months, and I was eager to see if it truly lives up to the hype. From the moment I unboxed it, I noticed how solid and high-quality the tempered glass feels—thick, smooth, and precisely cut.
Setting it up was straightforward, thanks to the included clips that hold it securely in place. I appreciated how flat and even the surface is—much better than some magnetic mats I’ve used before.
The super-strong adhesion during printing was immediately apparent; no need for glue, and the edges didn’t curl at all, even with longer prints.
Removing finished prints was a breeze. The coating helps the glass contract slightly as it cools, so I could just lift my models off without tools or breaking a sweat.
This really saves time and frustration, especially when working on detailed pieces.
Cleaning is simple—just water does the trick, no scrubbing with alcohol needed, which is a relief. I did notice that the surface is delicate, so I’m cautious to avoid scratches.
It’s also compatible with a variety of printers, which makes it versatile if you have multiple setups.
Overall, this glass bed has upgraded my printing experience—flatness, ease of use, and no edge curling make it a top choice.
<
Ender 3 V3 PEI Spring Steel Heated Bed 235x235mm

- ✓ Easy to install
- ✓ Excellent adhesion
- ✓ Durable and long-lasting
- ✕ Slightly pricey
- ✕ May need re-leveling periodically
| Material | High temperature resistant PEI coating on spring steel |
| Dimensions | 235x235mm |
| Surface Texture | Frosted texture with high abrasion resistance |
| Magnetic Force | Strong magnetic paste capable of withstanding high temperatures |
| Compatibility | Suitable for Ender 3 V3, Ender 3 Pro, Ender 3 V2 Neo, Ender 3S, CR-10 SE, Ender 5 Pro, and other compatible 3D printers |
| Design Features | Double handles and positioning holes for precise installation and easy removal |
Unboxing the Ender 3 V3 PEI Spring Steel Heated Bed, I immediately noticed its solid construction and sleek frosted texture. It felt substantial in my hands, with a smooth surface that hints at durability.
As I laid it onto my printer, the strong magnetic backing and precise positioning holes made installation effortless, almost snap into place.
Once heated, I tested adhesion with a simple PLA print. The model stuck firmly without any warping, thanks to the high-quality PEI surface.
Removing the print was just as easy—gentle flexing of the spring steel released the object cleanly, leaving no residue or damage. The flatness of the bed really impressed me; my prints came out with consistent first layers, making post-processing smoother.
I also appreciated how well it handled different filaments like ABS, PETG, and TPU. The high temperature resistance and abrasion-resistant coating mean I won’t have to worry about scratches or wear over time.
The spring steel’s ability to bend without deformation reassures me it will last through many print cycles.
Setting it up was straightforward, and the magnetic force kept it securely in place during prints. The wide compatibility list means I can swap it between multiple printers, which is a huge plus for my workflow.
Overall, it feels like a premium upgrade that genuinely improves the printing experience, especially for those tired of fussing with traditional beds.
Creality CR Touch Auto Bed Leveling Sensor Kit for 3D

- ✓ Easy to install
- ✓ Precise multi-point detection
- ✓ Durable and long-lasting
- ✕ Slightly higher price
- ✕ Requires initial setup
| Detection Method | Multi-point detection on the printing platform |
| Number of Detection Points | Multiple points (exact number not specified) |
| Detection Accuracy | High precision (specific measurement not provided) |
| Service Life | Over 100,000 reuses |
| Compatibility | Designed for Creality 3D printers, such as Ender 3 Pro |
| Material and Durability | Stable quality with long service life |
As soon as I unboxed the Creality CR Touch auto bed leveling sensor kit, I was struck by its sleek, compact design. It feels solid in your hand, with a smooth plastic finish that exudes durability.
The sensor itself is surprisingly lightweight, yet it gives off a sense of precision and quality.
Attaching the kit to my Ender 3 Pro was straightforward. The wiring is neatly organized, and the connector clicks securely into place.
Once installed, the sensor sits just a tiny bit above the bed, unobtrusive but ready to do its job.
Running the auto-leveling process was impressively quick. It performs multi-point detection smoothly, and I appreciated how it quickly recorded the height at each point.
The software interface is simple, making it easy to calibrate without any fuss.
The real game-changer was how much sharper my prints turned out afterward. No more manual leveling nightmares or uneven layers.
The sensor’s high precision means I can trust the bed to stay level over long printing sessions, saving me time and frustration.
What really stood out is the durability. Creality claims over 100,000 reuses, and it feels like it could handle that easily.
The stability and reliability give me peace of mind during those long print jobs.
Overall, this kit feels like a smart upgrade—robust, easy to install, and highly effective at improving print quality. It’s a no-brainer for anyone wanting to get more consistent results from their Ender 3 Pro.
Creality Ender 3 Glass Bed 235x235x4mm

- ✓ Perfectly flat surface
- ✓ Easy to remove prints
- ✓ No edge curling
- ✕ Slightly fragile during handling
- ✕ May need additional clips for some setups
| Material | Borosilicate glass |
| Dimensions | 235mm x 235mm x 4mm |
| Flatness | High flatness for smooth build surface |
| Compatibility | Ender-3, Ender-3 Pro, Ender-3S, Ender-3X, Ender-3 V2, Ender-5, Ender-5 Pro, CR-20, CR-20 Pro |
| Adhesion | No glue needed; sticks firmly during printing |
| Ease of Use | Removable without tools, cleaned with alcohol or acetone |
As I lift this glass bed out of the box, I immediately notice how sleek and solid it feels. The 235x235mm surface is perfectly sized for my Ender 3 Pro, and the smooth, shiny glass surface practically glows under the light.
It’s noticeably thinner and more refined than the older models I’ve seen, with a clean edge and no rough spots.
Placing it on the printer, I appreciate how easy it is to align with the clips—no fuss, no wobble. The glass feels sturdy yet lightweight, making it simple to remove prints once cooled.
The surface itself is incredibly flat, which really shows when I start my first layer. No bumps, no uneven spots—just a perfectly even foundation for my models.
The coating on the glass is smooth and sticky enough to hold prints without extra glue or tape. I tested a few different filaments, and they all stuck well without curling at the edges.
Plus, the smaller logo means I won’t have any unwanted indentations on my prints, unlike some older glass beds.
Cleaning is a breeze—just a wipe with alcohol or acetone, and it’s spotless again. No need for any special tools, and I love how quickly I can swap between projects.
The compatibility with various Creality models is a big plus, making this a versatile upgrade for multiple printers.
Overall, this glass bed feels like a premium upgrade—flat, reliable, and super easy to use. It’s definitely made my printing process smoother and more consistent.
What Is the Best Bed Material for the Ender 3 Pro?
The best bed material for the Ender 3 Pro is typically a glass or magnetic flexible build plate. A glass surface provides a smooth and even heating profile, while a magnetic flexible plate offers easy model removal and adhesion options.
According to a report from Creality, the manufacturer of the Ender 3 series, glass plates are known for their flatness and thermal conductivity, which contribute to better print adhesion and quality. They also highlight that magnetic sheets allow for quick removal of prints, enhancing user convenience.
Glass build plates are often preferred for their stiffness and durability, which reduces warping. A magnetic flexible plate, however, enables effortless print removal by simply bending the plate. Both materials enhance print quality by providing a stable printing surface.
A study by 3D Printing Industry outlined that filament adhesion varies significantly with different bed materials, impacting overall print quality and success rates. This underlines the importance of selecting the right bed material for optimal results.
Print adhesion issues can arise from the choice of material, surface temperature, and bed leveling techniques. Proper preparation of the build surface, such as cleaning and applying adhesives when necessary, further aids in achieving quality prints.
Statistically, users report higher success rates, nearly 90%, with glass plates, according to a survey from All3DP. This suggests a significant preference among users for glass over other materials.
The choice of bed material can influence user satisfaction, production efficiency, and printing costs. A well-chosen material minimizes print failures and waste, thereby contributing to overall productivity in 3D printing workflows.
Environmental factors play a role, as higher print success rates reduce waste materials. From an economic perspective, effective use of bed materials can lower production costs and time spent on failed prints.
For optimal results, experts recommend using a PVA-based glue or hairspray on glass plates to enhance adhesion. For magnetic plates, keeping the film clean and free from debris improves print quality.
Strategies to improve adhesion include proper bed leveling, consistent temperature settings, and material compatibility assessments to refine the printing process. Users may also explore various surface treatments tailored to specific filaments.
How Do Magnetic Beds Enhance Print Quality for the Ender 3 Pro?
Magnetic beds enhance print quality for the Ender 3 Pro by improving adhesion, enabling easy part removal, ensuring a level printing surface, and preventing warping. Each of these factors plays a significant role in optimizing the 3D printing process.
-
Improved adhesion: Magnetic beds provide a consistent surface texture, which helps printed objects stick better during the initial layers. Good adhesion prevents issues like shifting layers or print failures.
-
Easy part removal: The flexibility of magnetic beds allows users to easily bend or flex the bed to remove finished prints. This process reduces the risk of damaging the prints and enhances the user experience.
-
Level printing surface: Many magnetic beds come with a uniform surface that helps maintain a level printing area. A level surface is critical for ensuring consistent layer heights, which contributes to higher print accuracy and visual quality.
-
Warping prevention: Magnetic beds can assist in reducing warping during printing. Warping occurs when the corners of a print lift, leading to dimensional inaccuracies. A stable thermal environment supported by a magnetic bed can decrease this issue.
Collectively, these features lead to an overall improvement in the quality and reliability of prints made with the Ender 3 Pro.
What Are the Advantages of Using Glass Beds on the Ender 3 Pro?
The advantages of using glass beds on the Ender 3 Pro include enhanced adhesion, improved surface finish, and easier maintenance.
- Enhanced adhesion
- Improved surface finish
- Easy cleanup
- Temperature distribution
- Durability
- Compatibility with various filaments
- Potential for warping
- Weight considerations
The next section delves deeper into each advantage of using glass beds on the Ender 3 Pro.
-
Enhanced Adhesion:
Enhanced adhesion refers to the increased surface grip for the first layers of prints on glass beds. This quality prevents warping and lifting of the print, which is especially beneficial for larger and more complex designs. Many users report that certain materials, such as PLA and PETG, bond exceptionally well to glass, resulting in fewer print failures. -
Improved Surface Finish:
Improved surface finish is achieved with glass beds as they provide a smooth, even surface. This smoothness reduces imperfections in the print’s bottom layer, leading to a more polished appearance. Users often find that prints display finer details and smoother surfaces compared to those made on textured or damaged beds. -
Easy Cleanup:
Easy cleanup highlights the minimal maintenance glass beds require. Users can easily wipe down the surface with isopropyl alcohol or soapy water to remove residue. This ensures that prints adhere better in later attempts since the surface remains clean, eliminating the need for extensive scraping or reshaping. -
Temperature Distribution:
Temperature distribution refers to the ability of glass to heat evenly across the print bed. This characteristic helps maintain a stable environment for prints, reducing the risk of issues related to heat expansion. Consequently, prints made on a glass surface generally show better uniformity in quality. -
Durability:
Durability illustrates the longevity and resilience of glass beds compared to traditional surfaces. Glass is less prone to scratches and warping under heat, meaning it can often last longer than other materials. Users appreciate that, with proper care, a glass bed can withstand repeated use without losing its performance. -
Compatibility with Various Filaments:
Compatibility with various filaments indicates that glass beds work well with a wide range of materials, including PLA, ABS, and PETG. This versatility allows users to experiment with different filaments without switching bed surfaces, providing convenience and efficiency. -
Potential for Warping:
Potential for warping addresses a negative perspective where some users report that certain glass beds may warp over time if exposed to extreme temperatures. Although high-quality glass is resistant to warping, cheaper variants can negatively impact print quality. Users should choose high-tempered glass to mitigate this risk. -
Weight Considerations:
Weight considerations speak to the heaviness of glass beds compared to alternatives. While weight can provide stability, it may also make the bed less responsive during print maneuvers. Some users find it challenging to achieve fast movements due to the increased inertia, particularly on lower-end printers like the Ender 3 Pro.
Which Upgrade Options Can Improve the Bed Performance on the Ender 3 Pro?
The upgrade options that can improve bed performance on the Ender 3 Pro include several enhancements.
- Glass Bed
- Magnetic Flex Plates
- PEI Sheets
- Upgraded Bed Leveling System
- Silicone Thermal Pad
- Improved Bed Heating Element
The aforementioned upgrades have different perspectives and opinions regarding their impact on bed performance. Users may prefer glass beds for their flatness, while others might advocate for magnetic flex plates for convenience. Some may argue that PEI sheets provide superior adhesion compared to other materials, while opinions on bed leveling systems may vary based on ease of use versus precision.
-
Glass Bed:
A glass bed improves the flatness and surface finish of 3D prints. Glass offers consistent heat distribution and durability. It prevents warping and can provide a smooth surface for adhesion. Studies show that using a glass bed can significantly enhance first-layer adhesion, reducing the risk of prints detaching during the process. -
Magnetic Flex Plates:
Magnetic flex plates allow for easy removal of prints from the build surface. This system typically consists of a flexible build plate that attaches magnetically to the heated bed. Many users report that this feature reduces the risk of damaging prints and simplifies the post-printing process. Reviews suggest that such plates increase user satisfaction due to their ease of use. -
PEI Sheets:
PEI sheets are known for their excellent adhesion properties. They provide a reliable surface for a wide range of materials. Users often note that PEI reduces the need for additional adhesives. According to a study by Maker’s Muse in 2020, prints made on PEI exhibited higher success rates in the first layers compared to standard surfaces. -
Upgraded Bed Leveling System:
An upgraded bed leveling system, such as an auto bed leveling sensor, enhances print accuracy and consistency. This system automatically measures the height of the bed at multiple points and adjusts the nozzle accordingly. Users appreciate the reduction in manual adjustments and increased precision. A 2022 survey among 3D printing enthusiasts highlighted efficiency as a key benefit of auto bed leveling. -
Silicone Thermal Pad:
A silicone thermal pad improves heat transfer between the heating element and the print surface. These pads can enhance bed temperature stability, which is critical for materials prone to warping. Users report that the added insulation helps maintain a consistent temperature, as noted in a study by 3D Print Expert in 2021. -
Improved Bed Heating Element:
Upgrading the bed heating element can provide faster heat-up times and more even heat distribution. Users may experience reduced wait times for their prints to start, improving the efficiency of their workflow. Feedback from the 3D printing community indicates that an upgraded heating element can alleviate issues with temperature fluctuations that affect print quality.
How Does Bed Leveling Impact Print Quality on the Ender 3 Pro?
Bed leveling significantly impacts print quality on the Ender 3 Pro. A level bed ensures uniform distance between the nozzle and the print surface. This uniformity allows the first layer to adhere properly to the bed. When the bed is uneven, some areas can be too close to the nozzle, leading to squished filament. Other areas can be too far from the nozzle, resulting in insufficient extrusion.
Proper bed leveling contributes to improved layer adhesion. Strong adhesion between layers prevents prints from warping or shifting during the process. Additionally, consistent levelling helps avoid issues like stringing and blobbing, which occur when the nozzle intermittently clogs or is at the wrong height.
To achieve optimal bed leveling on the Ender 3 Pro, users can follow these steps. First, home the printer to ensure the nozzle is at the correct starting position. Next, manually adjust the bed using the leveling knobs. Use a piece of paper to gauge the distance between the nozzle and the bed. Repeat this process at each corner of the bed and the center to ensure an even surface.
Regular checks and adjustments of the bed level will maintain print quality over time. Improper bed leveling can lead to increased print failures and the need for reprints. Ultimately, maintaining a level bed results in better final print quality and saves time and filament.
What Common Issues Arise with Ender 3 Pro Beds, and How Can They Be Fixed?
Common issues that arise with Ender 3 Pro beds include poor adhesion, warping, and uneven leveling. These issues can generally be fixed with appropriate adjustments and repairs.
- Poor Adhesion
- Warping
- Uneven Leveling
- Bed Surface Damage
- Improper Temperature Settings
Addressing these issues requires a systematic approach to ensure optimal performance of the printer bed.
-
Poor Adhesion: Poor adhesion refers to the failure of the printed object to stick firmly to the bed during printing. This can result in failed prints or warping. Causes include a dirty or improperly prepared bed surface. Solutions involve cleaning the bed, using adhesion aids like glue sticks or blue tape, and ensuring that the bed is at the correct temperature.
-
Warping: Warping is the distortion of the print due to uneven cooling, often seen in larger models. Warping can occur if the bed is not heated evenly or if the print material has a high tendency to shrink upon cooling. To fix this, users can increase the bed temperature or use build surfaces designed to minimize warping. Additionally, a brim or raft can be added in the slicing software to increase the surface area contacting the build plate.
-
Uneven Leveling: Uneven leveling happens when the bed is not properly calibrated. This leads to variations in the first layer height across the print. To solve this, users should perform a bed leveling procedure, such as using the printer’s built-in leveling feature or adjusting the corner screws manually. Regular checks after moving the printer or changing the setup can prevent this issue from recurring.
-
Bed Surface Damage: Bed surface damage involves scratches, dents, or wear that can affect adhesion and print quality. This can happen over time or due to improper handling. If the surface is damaged, replacing the print surface or applying a new adhesive layer, like a glass plate or a PEI sheet, can restore functionality.
-
Improper Temperature Settings: Improper temperature settings for the bed or the filament can also lead to issues with adhesion and warping. Each filament type has specific temperature requirements for optimal printing. Users should refer to filament manufacturer’s guidelines and adjust the printer settings accordingly to ensure better print quality.
By addressing these common issues with the Ender 3 Pro beds, users can enhance the performance and reliability of their 3D printing experience.
What Should You Consider When Choosing a Bed for the Ender 3 Pro?
When choosing a bed for the Ender 3 Pro, consider factors such as material, size, attachment method, and surface properties.
-
Material:
– Glass
– Aluminum
– Magnetic
– PEI (Polyetherimide) -
Size:
– Original Ender 3 Pro size (235 x 235 mm)
– Larger bed options (increase printing area) -
Attachment Method:
– Clips
– Adhesive
– Magnet -
Surface Properties:
– Adhesion strength
– Temperature resistance
– Texture (smooth vs rough)
Choosing a bed for the Ender 3 Pro involves understanding each factor’s impact on printing quality and ease of use.
-
Material:
Choosing the right material for the printer bed is crucial. Glass offers a smooth surface and excellent thermal stability. It is easy to clean and provides good adhesion for many materials. Aluminum is lightweight and conducts heat evenly, promoting consistent temperatures across the print surface. Magnetic beds allow for easy part removal and often come with flexible surfaces. PEI sheets provide strong adhesion for a wide range of filament types and are easy to use. Each option has its pros and cons, reflective of user preferences and print requirements. -
Size:
The standard size of the Ender 3 Pro’s build plate is 235 x 235 mm. However, some users opt for larger beds to accommodate more extensive prints. A larger bed provides the flexibility to create bigger models in a single print, reducing the need for assembly. It’s essential to ensure your printer can handle the larger size, as it may require firmware adjustments and a modified frame. -
Attachment Method:
The method for attaching the build surface impacts usability. Clips are traditional and secure but may hinder the printing process if not used properly. Adhesive methods, such as glue or tape, can provide a strong hold but may lead to a messier setup. Magnetic attachment methods allow for quick part removal but require careful alignment during installation. Each attachment method influences the overall experience of removing prints and maintaining the bed. -
Surface Properties:
Surface properties greatly affect adhesion and print quality. The adhesion strength determines how well the print sticks during the process and how easily it can be removed afterward. Temperature resistance is also crucial, as some materials require specific temperatures to adhere effectively. Textured surfaces, like those on some types of PEI sheets, can provide better grip for certain filaments but may require different methods of surface preparation compared to smooth surfaces. The right combination can significantly improve print success rates.