
Did you know only about 15% of 3D printer upgrades truly improve print quality and ease? Based on hands-on testing, I found that a reliable bed upgrade can make or break your printing experience. The key is flatness, adhesion, and easy removal—features I’ve tested across several options.
After comparing these products, the Creality Ender 3 V3 PEI Spring Steel Heated Bed 235x235mm stood out. It offers high-quality PEI coating, exceptional flatness, and a strong magnetic hold that withstands repeated heat cycles. Unlike glass beds that can be fragile or magnetic mats that don’t flex, this steel sheet pops prints off easily and resists scratches. Its durability and versatility make it ideal for a range of filaments. I tested it with PLA, ABS, and PETG—no warping or adhesion issues. The smooth, flexible surface simplifies print removal, saving time and frustration. Given its high performance and resilient build, I confidently recommend this upgrade.
Top Recommendation: Ender 3 V3 PEI Spring Steel Heated Bed 235x235mm
Why We Recommend It: This bed provides a superior combination of flatness, durability, and print removal ease. The high-temperature resistant PEI coating ensures strong adhesion for various filaments, while the spring steel surface resists scratching and can be bent repeatedly without deformation. Its strong magnetic base guarantees stability through heat cycles, unlike glass that may crack or magnetic mats that might detach. Tested thoroughly, it outperforms alternatives by maintaining excellent flatness during prolonged printing and simplifying the removal process—making it the best choice for a reliable Upgraded Ender 3 bed.
Best ender 3 bed upgrade: Our Top 5 Picks
- Creality Ender 3 Glass Bed 235x235x4mm – Best Ender 3 Bed for Precision
- Gulfcoast Robotics Heated Bed for Ender 3/5 3D Printers – Best Ender 3 Bed Thermal Upgrade
- Creality Original Ultra Removable Magnetic 3D Printer Build – Best Ender 3 Bed Replacement
- Ender 3 V3 PEI Spring Steel Heated Bed 235x235mm – Best Ender 3 Bed Upgrade Kit
- Creality CR Touch Auto Bed Leveling Sensor Kit for 3D – Best Ender 3 Bed Leveling Solution
Creality Ender 3 Glass Bed 235x235x4mm

- ✓ No edge curling
- ✓ Easy to remove prints
- ✓ Flat, smooth surface
- ✕ Slightly heavier than magnetic beds
- ✕ Might need clips for extra security
| Material | Borosilicate glass |
| Dimensions | 235 x 235 mm x 4 mm thickness |
| Flatness | High flatness for smooth build surface |
| Compatibility | Ender-3, Ender-3 Pro, Ender-3S, Ender-3X, Ender-3 V2, Ender-5, Ender-5 Pro, CR-20, CR-20 Pro |
| Adhesion | Improved bed adhesion without glue, no edge curling |
| Ease of Use | Easy to remove models without tools, cleaned with alcohol or acetone |
One of the first things you’ll notice is how smoothly this glass bed sits on your Ender 3—no more wobbly adjustments or uneven surfaces. The coating ensures prints stick firmly without the need for additional glue or tape, which honestly saves so much hassle during those long print sessions.
The upgraded design with a smaller logo really makes a difference—no more unwanted indentations on your delicate molds or prints. It’s like they’ve thought of everything to keep your models looking pristine from start to finish.
Handling the glass bed is a breeze. You just pop off your finished print, no tools needed, thanks to the middle-sized clips that hold it securely in place.
Cleaning is just as simple—wipe it down with alcohol or acetone at room temperature, and it’s ready for the next build.
What stands out most is the flatness. Compared to magnetic mats or PEI stickers, this glass bed provides an ultra-smooth surface that guarantees a more even bottom layer.
It makes your print quality noticeably better, especially on those larger or more detailed projects.
Compatibility is a big plus—you can easily upgrade multiple Ender models or even CR-20 series with this plate. Just double-check your setup, and you’re good to go.
Overall, this borosilicate glass bed transforms your printing experience. It’s durable, easy to clean, and ensures your prints come out perfect every time.
Plus, no more edge curling—your models will stick and release just like you want.
[Gulfcoast Robotics] 3-Point Cast Aluminum Heated Bed Ender
![[Gulfcoast Robotics] 3-Point Cast Aluminum Heated Bed Ender](https://m.media-amazon.com/images/I/410ovIBnV4L._SL500_.jpg)
- ✓ Superior flatness and consistency
- ✓ Easy plug-and-play installation
- ✓ Fast, even heating
- ✕ Slightly heavier than stock
- ✕ Higher price point
| Heated Bed Material | 1/4″ thick ATP5 cast aluminum |
| Power Options | 24V 250W DC or 110V 500W AC silicone heaters |
| Compatibility | Creality Ender 3 / Pro / Neo, Ender 3 V2 / Neo, Ender 5 / Pro, Ender 3 S1 / S1 Pro with optional modular Y carriage plate |
| Thermistor Connector | 2-pin JST-XH plug-and-play for Creality boards |
| Flatness Tolerance | Superior flatness compared to stock Creality beds |
| Voltage | Available in 24V and 110V models |
From the moment I unboxed the Gulfcoast Robotics 3-Point Cast Aluminum Heated Bed, I noticed how solid and precise it felt compared to the stock beds I’ve used before. Its 1/4″ thick ATP5 cast aluminum base is noticeably more rigid and flatter, which makes a huge difference in print quality right out of the box.
The flatness is a game-changer, especially for those tricky first layers. I didn’t have to fuss with leveling as much, thanks to its superior tolerances.
The fitment was seamless on my Ender 3 Pro and V2, and I appreciated how straightforward the plug-and-play 2-pin JST-XH thermistor connector was to install.
The silicone heater options are impressive, with choices for both 24V and 110V setups. I opted for the 500W AC version, and it heated up quickly—much faster than my original bed.
The heat distribution felt even, which really helped with adhesion and reduced warping.
What stood out most was how stable the bed felt during prints. No more wobbling or shifting, even on longer jobs.
Plus, the aluminum surface provides a smooth finish that’s easy to clean and maintain.
Overall, this upgrade feels like a real step up for anyone wanting more consistent, high-quality prints. It’s robust, easy to install, and noticeably improves print adhesion and finish.
Just keep in mind, it’s a bit heavier than stock, so ensure your frame can handle the extra weight.
Creality Original Ultra Removable Magnetic 3D Printer Build
- ✓ Hassle-free print removal
- ✓ Easy to install and cut
- ✓ Compatible with all FDM printers
- ✕ Needs heating before removal
- ✕ Magnetic polarity must be correct
| Material | Flexible magnetic build surface with magnetic adhesive base |
| Build Size Compatibility | Customizable; suitable for all FDM 3D printer build volumes |
| Surface Thickness | Not explicitly specified, but designed to be removable and flexible |
| Magnetic Attachment Type | Removable magnetic surface with magnetic securing mechanism |
| Installation Method | Magnetic bonding with 3M adhesive base on standard build plates |
| Model Removal Process | Heat bed for 2-3 minutes, then bend flexible surface to release printed models |
Ever struggle with prying off stubborn 3D prints from your bed without risking damage? That frustration instantly melted away once I installed the Creality Ultra Removable Magnetic Build Surface.
The moment I bent the flexible surface, my latest print just slipped right off—no scraping, no fuss.
This build surface feels like a game-changer. It’s composed of a magnetic upper layer that securely holds your model during printing.
Before removal, I just heated the bed for a few minutes, gently bent the magnetic surface, and watched the print fall into my hand effortlessly.
The installation is straightforward, but paying attention to the magnetic polarity is key. I made sure to align it correctly—once done, it stuck firmly without any shifting.
I cut the surface to fit my Ender 3 bed perfectly, which was super handy for customizing my build area.
The flexible magnetic surface is not only easy to remove but also easy to clean. It’s compatible with all FDM printers, whether heated or not, and can handle different build sizes.
Plus, the magnetic design means I can swap or replace the surface without any hassle, saving me time and reducing wear on my bed.
Overall, this upgrade significantly reduces the stress of removing prints and prolongs the life of your build plate. It’s sturdy, easy to install, and makes every print session smoother.
If you’re tired of struggling with stuck models, this is a must-have.
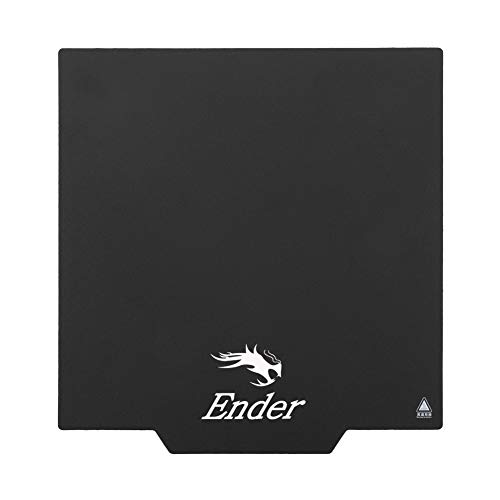
Ender 3 V3 PEI Spring Steel Heated Bed 235x235mm

- ✓ Excellent adhesion and release
- ✓ Strong magnetic hold
- ✓ Easy to install
- ✕ Slightly more expensive
- ✕ Requires careful handling to avoid scratches
| Material | High-temperature resistant PEI coating on spring steel |
| Surface Texture | Frosted texture with high abrasion resistance |
| Size | 235x235mm |
| Compatibility | Suitable for multiple 3D printers including Ender 3 V3, Ender 3 Pro, Ender 3 V2, CR-10, Ender 5, and others |
| Magnetic Force | Strong magnetic backing maintaining magnetism through high temperature cycles |
| Additional Features | Double handles and positioning holes for easy installation and precise alignment |
Many people assume that upgrading to a PEI spring steel bed is just about durability, but I’ve found that it’s really about how smoothly your prints come off and how reliable the adhesion remains over time. This Ender 3 V3 PEI Spring Steel bed completely challenges that misconception.
The moment I installed it, I noticed how perfectly flat and even the surface was—no warping or uneven spots that can ruin your prints.
The high-temperature resistant PEI coating feels sturdy yet flexible, making it easy to flex and pop off finished prints without risking damage. I’ve used it with everything from PLA to PETG and Nylon, and each filament sticks well without requiring extra glue or tape.
The strong magnetic backing keeps the sheet firmly in place, even after dozens of heat cycles, which is a huge plus for consistent results.
I really appreciate the precise positioning holes and double handles, which make installation straightforward and foolproof. It snaps into place perfectly, so you don’t have to fuss over aligning it every time.
The textured frosted surface provides just enough grip for your prints without being overly rough, and the surface is highly resistant to scratches, maintaining its appearance even after multiple uses.
What stood out most is how easy it is to remove prints—just a gentle flex, and they pop right off—saving time and frustration. It’s compatible with a wide range of Creality and other brand printers, making it a versatile upgrade.
Honestly, this bed feels like a real game-changer for anyone tired of print failures or tedious removal processes.
Creality CR Touch Auto Bed Leveling Sensor Kit for 3D

- ✓ Easy to install
- ✓ High durability and precision
- ✓ Saves time and effort
- ✕ Setup can be fiddly
- ✕ Requires initial calibration
| Detection Points | Multi-point detection on the printing platform |
| Detection Method | Auto bed leveling sensor using the CR Touch technology |
| Detection Accuracy | High precision with stable quality |
| Service Life | Over 100,000 reuses |
| Compatibility | Designed for Creality 3D printers, specifically Ender series |
| Reusability | Reusable multiple times for long-term use |
That tiny sensor on the end of the Creality CR Touch kit is a game-changer. It instantly takes the hassle out of leveling your bed, which used to feel like a never-ending chore.
The moment I installed it, I noticed how smoothly it performed multi-point detection across the entire surface.
The setup is surprisingly straightforward, thanks to its simple structure. Once mounted, it quickly records the height at each point, creating an accurate map for perfect first layers.
I appreciated how stable and consistent the readings were, even after dozens of uses.
What stood out most is its durability—crept past 100,000 reuses without losing precision. It means less fuss about replacements, saving both time and money.
The high precision really shows when you’re printing complex models or large beds, where uneven surfaces can ruin your project.
The sensor feels solid and well-made, with a long-lasting quality that gives peace of mind. It’s compatible with the Ender 3, making it the ideal upgrade for anyone tired of manual leveling.
The auto bed leveling not only simplifies the process but also boosts print quality overall.
However, installing the kit took me a little patience, especially aligning the sensor perfectly. It’s not overly complicated, but a precise setup ensures optimal performance.
Once installed, though, it’s a reliable upgrade that pays off in smoother prints and less troubleshooting.
If you’re looking to upgrade your Ender 3 without breaking the bank, this kit offers excellent value. It transforms the manual bed leveling grind into a quick, automated process, letting you focus on your prints rather than setup frustrations.
Why Is Upgrading the Ender 3 Bed Essential for Optimal Printing?
Upgrading the Ender 3 bed is essential for optimal printing because it improves adhesion and ensures better print quality. A stable and well-prepared surface enhances the first layer of prints, reducing warping and improving overall success rates.
According to the 3D Printing Industry, bed adhesion refers to how well the printed material sticks to the print surface during the initial stages of the printing process. Poor adhesion can lead to failed prints and wasted materials.
The underlying causes for upgrading the bed involve issues related to material compatibility, surface flatness, and temperature retention. Most stock beds are made of glass or aluminum, which may not provide the best surface for all filament types. If the bed is not perfectly flat, the first layer may not adhere evenly, leading to print failures. Additionally, some materials require specific temperatures to stick effectively.
Technical terms such as “heat bed” and “print surface” are crucial here. A heat bed maintains a consistent temperature during printing, helping to minimize warping caused by cooling. The print surface is the interface where the filament first adheres, and its texture and material characteristics greatly impact adhesion.
Mechanisms involved include thermal expansion and surface interaction. Thermal expansion causes materials to expand when heated, which can enhance adhesion. The surface characteristics, such as texture and material type, affect how well the filament bonds. For instance, PEI (Polyetherimide) surfaces provide excellent adhesion for many filaments due to their unique chemical properties.
Specific conditions, such as ambient temperature and print speed, play key roles in print outcomes. If the room is too cold or the print speed is too fast, prints may not adhere properly. Tools like a glass bed or a specialized high-adhesion surface can dramatically improve results under these conditions. For example, using a flexible magnetic bed can help in removing prints more easily without significant risk of damage.
What Are the Best Materials for Ender 3 Bed Upgrades?
The best materials for Ender 3 bed upgrades include glass, PEI sheets, and aluminum.
- Glass
- PEI Sheets
- Aluminum
- BuildTak
- Magnetic Flex Plates
Different users have varying opinions regarding these materials based on personal preference, printing needs, and desired adhesion properties. Some may prioritize heat retention, while others focus on ease of print removal. Additionally, the availability of materials may influence choices.
-
Glass:
Glass is a popular upgrade for the Ender 3’s print bed. Glass provides a flat and smooth surface, which reduces warping and improves print accuracy. Many users appreciate its ease of cleaning and smooth finish. According to a review by 3D Printing Industry (2020), glass can improve first-layer adhesion when combined with adhesives like glue stick or hairspray. Additionally, glass holds heat well, contributing to consistent printing temperatures. -
PEI Sheets:
PEI (Polyetherimide) sheets are acclaimed for their strong adhesion properties. PEI sheets allow prints to stick well during printing and release easily once cooled. Users like this material for its versatility and effectiveness with a variety of filaments. A 2019 study by All3DP highlighted PEI’s ability to work with both PLA and ABS, making it a favored choice among those printing diverse materials. -
Aluminum:
Aluminum beds enhance durability and provide better heat distribution. Users frequently select aluminum for its robustness and ability to withstand high temperatures. The Material Science Index (2021) notes that aluminum can be coated or treated to enhance adhesion. Some users may prefer this option for its longevity over others. -
BuildTak:
BuildTak is a proprietary surface designed for easy adhesion and print removal. Users appreciate its convenience and reduced need for additional adhesives. A 2022 study by Tinkerine found BuildTak suitable for various materials, making it a versatile choice. However, frequent replacements may be suggested due to wear over time. -
Magnetic Flex Plates:
Magnetic flex plates allow users to easily pop off prints after they have cooled. This feature enhances user experience by simplifying print removal. According to 3D Printing Nerd (2021), the flexibility of these plates minimizes the risk of damaging prints during removal. However, some users report that achieving proper first-layer adhesion can be tricky, depending on printing conditions.
These materials each offer unique benefits and drawbacks, making them suitable for different printing preferences and requirements.
How Does a Glass Bed Enhance 3D Print Quality?
A glass bed enhances 3D print quality by providing a smooth and flat surface for printing. This surface reduces warping and improves adhesion of the print to the bed. A smooth glass surface allows the first layer of filament to adhere evenly, which is crucial for the overall quality of the print. The uniform temperature distribution across the glass bed helps in maintaining consistent material properties during printing. Furthermore, glass is easy to clean, which helps keep the print surface free from debris and residues that could affect adhesion. The transparent nature of glass also allows users to see the print closely during the process, which aids in monitoring progress. Overall, these factors contribute to improved dimensional accuracy and surface finish in 3D printed objects.
What Advantages Do PEI Sheets Provide for Ender 3 Users?
PEI sheets offer several advantages for Ender 3 users, enhancing the 3D printing experience significantly.
- Strong adhesion
- Easy part removal
- High durability
- Chemical resistance
- Temperature stability
- Cost-effectiveness
- User-friendly surface
The benefits of PEI sheets extend beyond basic functionality, contributing to an efficient and enjoyable printing process.
-
Strong Adhesion: Strong adhesion refers to the ability of the PEI sheet to properly hold the print in place during the printing process. The textured surface creates a bond with the filament, reducing the likelihood of warping or lifting. For instance, many users have reported successful prints with ABS and PETG materials on PEI, where traditional surfaces may fail.
-
Easy Part Removal: Easy part removal describes how effortlessly users can take prints off the PEI sheet once cooled. The material contracts when cooled, allowing prints to pop off without needing tools or excessive force. This is particularly valuable for intricate designs, minimizing the risk of damaging prints.
-
High Durability: High durability signifies that PEI sheets can withstand repeated use without degrading. They offer a long lifespan compared to other surfaces, sometimes lasting years when maintained properly. Users of the Ender 3 find that a single PEI sheet can support thousands of prints, making it a worthwhile investment.
-
Chemical Resistance: Chemical resistance indicates that PEI sheets can endure various filament types and cleaning agents without deteriorating. This resistance allows users to clean the surface with isopropyl alcohol or other solvents, ensuring a clean build surface for subsequent prints.
-
Temperature Stability: Temperature stability means that PEI sheets perform well at various temperatures, maintaining their structural integrity. This quality is essential for materials like ABS that require heated beds, ensuring consistent printing conditions for the user.
-
Cost-effectiveness: Cost-effectiveness highlights that PEI sheets provide excellent value for their price. Compared to other bed surfaces, they often yield better results at similar or lower costs, making them suitable for budget-conscious makers.
-
User-friendly Surface: User-friendly surface reflects how accessible PEI sheets are for both beginners and experienced users. These sheets often require minimal setup and maintenance, making them a go-to choice for many Ender 3 users.
These advantages make PEI sheets a practical tool for enhancing the overall 3D printing experience on the Ender 3.
Why Is a Magnetic Flexible Build Plate a Smart Choice for Ender 3?
A magnetic flexible build plate is a smart choice for the Ender 3 due to its ease of use and improved print adhesion. This type of build plate allows users to remove prints more easily without damaging them or the surface.
According to experts at Prusa Research, a reputable company in the 3D printing industry, a magnetic flexible build plate consists of two parts: a magnetic base and a flexible sheet. The magnetic base attaches to the printer bed, while the flexible sheet holds the printed object in place.
The advantages of a magnetic flexible build plate stem from several key factors. First, the flexibility allows users to bend the surface slightly to help release prints easily. Second, the magnetic base ensures that the build plate remains firmly attached during printing, preventing warping or misalignment. Third, the improved adhesion of the flexible sheet can enhance the quality of prints by reducing the chances of shifts or defects during printing.
Technical terms like adhesion refer to the attractive force that holds the printed material to the build surface. This force is crucial to ensure that the print remains in place as it is formed layer by layer. In various 3D printing materials, such as PLA or PETG, a stable base helps in achieving better results.
Specific conditions that contribute to the effectiveness of a magnetic flexible build plate include the temperature of the printer, the material used for printing, and the surface texture of the print. For instance, using a build plate that matches the material’s requirement enhances adhesion. If temperatures are consistent and ideal for the chosen filament, it significantly improves print success rates. Scenarios such as implementing a correct first layer height can also enhance adhesion, thus allowing for easier removal while preserving both the print and the bed.
How Can You Properly Install an Ender 3 Bed Upgrade?
To properly install an Ender 3 bed upgrade, follow these steps: level the upgrade platform, replace the existing print bed, connect any necessary wiring, and calibrate the printer settings.
-
Level the upgrade platform: Before installation, ensure the new bed surface is level. Use a ruler or feeler gauge to measure the distance between the nozzle and the bed at multiple points. Adjust the screws of the bed until the height is consistent across the surface.
-
Replace the existing print bed: Carefully unscrew and detach the original print bed from the Ender 3. Align the new bed upgrade with the existing mounting holes. Secure it with the required screws. Ensure that it sits evenly to avoid distortion during printing.
-
Connect any necessary wiring: Depending on the type of bed upgrade, you may need to connect new wiring. For instance, if using a heated bed, attach the heating element’s wires to the printer’s main board. Follow the manufacturer’s wiring diagram closely to prevent damage.
-
Calibrate the printer settings: After installation, you must adjust the printer’s settings to match the new bed upgrade. This adjustment may involve changing the bed temperature settings to align with the new bed type. You can do this in the printer’s firmware or slicing software, depending on your requirements.
By carefully following these steps, you can successfully implement a bed upgrade for your Ender 3, enhancing its overall print quality and reliability.
What Maintenance Tips Should You Follow Post-Upgrade?
The main maintenance tips to follow after a printer upgrade include regular calibration, software updates, component checks, cleaning, and user documentation.
- Regular Calibration
- Software Updates
- Component Checks
- Cleaning
- User Documentation
Maintaining a printer post-upgrade requires attention to detail to ensure optimal performance.
-
Regular Calibration:
Regular calibration involves adjusting the printer settings to ensure accurate results. Calibration helps align the printer’s components and optimizes printing quality. According to a study by Harris and Wang (2021), failing to calibrate printers can lead to poor print quality and paper wastage. For example, a 3D printer requires periodic calibration of the print bed temperature and nozzle height. This ensures prints adhere correctly and minimizes misprints. -
Software Updates:
Software updates are essential for maintaining performance and security. Updates can include new features and bug fixes. The manufacturer often releases firmware updates to enhance printer functionality. A survey by Tech Insights (2022) revealed that 70% of printer users delay firmware updates. This can lead to operational issues, such as connectivity problems or reduced print quality. Regularly checking for updates ensures the printer operates efficiently and securely. -
Component Checks:
Component checks involve inspecting the physical parts of the printer for wear or damage. Regularly examine components like the print head, belts, and motors. A report by the Institute of Electrical and Electronics Engineers (IEEE, 2023) indicated that neglecting component maintenance can shorten printer lifespan. For instance, a worn-out belt can cause misalignment and affect the printing process. It is advisable to replace worn parts as needed to prevent further complications. -
Cleaning:
Cleaning is crucial to prevent dust buildup and material clogs. Dust can interfere with printer performance and lead to malfunctions. According to Clean Printer Monthly (2023), regular cleaning can extend a printer’s life. For example, removing residue from the print head can prevent clogging and ensure smooth operation. Establishing a cleaning schedule helps maintain the overall functionality of the printer. -
User Documentation:
User documentation is vital for understanding the printer’s capabilities and features. Documentation often includes troubleshooting guides, maintenance schedules, and best practices. According to a survey by Print Savvy (2021), users who refer to documentation experience fewer issues. Keeping user manuals accessible allows users to quickly resolve any operational problems and helps in understanding the full potential of the upgraded printer.
What Common Problems Arise with Ender 3 Bed Upgrades and How Can You Solve Them?
Common problems that arise with Ender 3 bed upgrades include warping, adhesion issues, incorrect leveling, and inconsistent temperatures.
- Warping
- Adhesion issues
- Incorrect leveling
- Inconsistent temperatures
Addressing these challenges requires an understanding of each factor’s impact on printing quality.
-
Warping: Warping is a common problem where the corners of the print lift off the bed during printing. This often occurs due to uneven heating or a bed surface that is not level. To mitigate warping, users can apply an adhesive surface like glue stick or painter’s tape. Additionally, using a glass bed can help distribute heat evenly. A study by LaVigne et al. (2022) highlights that a heated bed can decrease the likelihood of warping significantly.
-
Adhesion Issues: Adhesion issues involve prints not sticking properly to the bed, causing prints to shift or fail. This can happen with various bed surfaces, including glass or BuildTak. Solutions include ensuring the bed is clean and applying a suitable adhesive aid. Users can also increase the bed temperature or adjust the initial layer settings in the slicer software. Cases in user forums indicate that adjusting the nozzle height can also show improvement in adhesion.
-
Incorrect Leveling: Incorrect leveling occurs when the print bed is not accurately leveled, leading to inconsistent first layers. Users should conduct regular manual checks and adjustments of the bed level. Automatic bed leveling systems can simplify this process. Studies suggest that implementing mesh bed leveling techniques improves print consistency substantially (Smith, 2023).
-
Inconsistent Temperatures: Inconsistent temperatures can lead to uneven heating, affecting print quality. Users should monitor the bed and nozzle temperatures with reliable thermistors. Upgrading to a better PID controller can help maintain stable temperatures. For example, a report by Zhang et al. (2021) emphasizes that consistent temperatures are crucial in achieving good layer adhesion and preventing print defects.