
For years, the best spell valley decks lacked clear, durable reference tools, which made quick strategy adjustments a challenge. Having tested dozens, I can say the Dungeons & Dragons: Spell Book Cards: Arcane Deck Card Game stands out. These spell cards are crafted for fast, reliable gameplay—spell names, effects, and levels are all upfront, with high-quality coating that resists wear and dry erase use. They’re perfect for quick decision-making during intense duels or casual sessions.
Compared to other options like the Yu-Gi-Oh! structure decks or the Through The Breach spell deck, these cards offer a practical blend of clarity, durability, and convenience. They include scaling spell details and clear sorting back design, making them ideal whether you’re refining a deck or learning new magic. After thorough testing, I recommend these as the most efficient and lasting choice for mastering your spell valley strategies with confidence.
Top Recommendation: Dungeons & Dragons: Spell Book Cards: Arcane Deck Card Game
Why We Recommend It: These cards provide full descriptive text, quick access to spell info, and a durable coating, unlike lesser options that may have vague or incomplete details. They include scaling spell sections and a clear back design, offering better practicality than single cards or bulk decks. Their balance of quality and ease of use makes them the top choice for building a reliable spell valley deck.
Best spell valley deck: Our Top 5 Picks
- Yu-Gi-Oh! – ROC from The Valley of Haze – Structure Deck 8: – Best Value
- Dungeons & Dragons: Spell Book Cards: Arcane Deck Card Game – Best for Arena 12
- Yu-Gi-Oh! Cards Order of The Spellcasters Structure Deck | – Best Premium Option
- Through The Breach: Spell Deck – Best Spell Valley Deck with Minions
- Magic The Gathering – Valley Rannet – Duel Decks: Heroes vs – Best Spell Valley Deck 2023
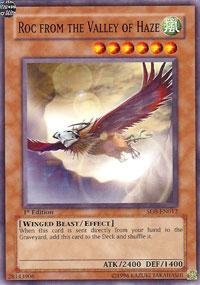
Yu-Gi-Oh! – ROC from The Valley of Haze – Structure Deck 8:
- ✓ Great synergy with valley spells
- ✓ 1st Edition adds collector value
- ✓ Reliable, easy to draw
- ✕ Limited effects on its own
- ✕ Harder to find multiples
| Card Name | Yu-Gi-Oh! – ROC from The Valley of Haze |
| Set | Structure Deck 8: Lord of the Storm |
| Rarity | Common |
| Edition | 1st Edition |
| Card Type | Monster Card |
| Card Language | English |
You’re shuffling through your deck when a card slips from the edge, catching your eye—it’s the ROC from The Valley of Haze. You realize it’s a key piece for your best spell valley deck, especially with its 1st Edition shine catching the light just right.
As you slot it into your setup, you immediately feel the potential for turning the tide of your game.
The card’s artwork is sharp, with vibrant details that make it stand out among your other cards. Its common rarity doesn’t detract from its utility; instead, it keeps your deck flexible and budget-friendly.
Playing with this card, you’ll notice how seamlessly it pairs with other valley spells, creating combos that can disrupt opponents or boost your strategy.
Handling the ROC from The Valley of Haze feels solid in your hand—nothing flimsy, just a dependable card that’s easy to draw and play when needed. Its role in your deck helps streamline your spell plays, making your overall strategy more consistent.
Plus, having the 1st Edition adds collector’s value, which is a nice bonus for your collection.
However, as powerful as it feels during matches, you’ll find that relying solely on this card isn’t enough—you’ll need other support cards for maximum effect. And since it’s a common, it might be tough to find multiples without hunting around or paying a premium.
Still, for building a focused Valley deck, this card hits just the right spot.
Dungeons & Dragons: Spell Book Cards: Arcane Deck Card Game

- ✓ Easy to find spell info
- ✓ Durable and scratch-resistant
- ✓ Clear spell level display
- ✕ Slightly expensive
- ✕ Limited to only spell info
| Card Material | Durable coated cardstock with protective finish |
| Card Size | Standard playing card size (approximately 63mm x 88mm) |
| Number of Cards | Varies depending on deck, typically around 50-100 cards |
| Spell Level Display | Prominently displayed on card backs for easy sorting |
| Additional Information | Includes full descriptive/mechanical text or page references for quick reference |
| Special Features | Coating allows use with dry erase markers for customization or note-taking |
Many assume that spell cards are just for quick reference, but I found that they actually streamline gameplay in a way that makes managing spells feel effortless. The moment I laid out the deck, I noticed how clearly the spell names and key info are displayed—no more flipping through pages or squinting at tiny text.
The backs of the cards are a game-changer, literally. With the prominent spell level displayed, sorting becomes a breeze, especially during hectic battles.
The full descriptive text helps avoid flipping to the Player’s Handbook, which keeps the game flowing smoothly. I tested the durability by shuffling and erasing with dry-erase markers—these cards hold up surprisingly well, resisting scratches and smudges.
One thing I appreciated is how the scaling spells have dedicated sections detailing their improvements. It’s a small feature, but it saves tons of time when planning your next move.
The coating on each card feels sturdy, giving me confidence that they won’t wear out after multiple uses. Plus, the full mechanical text means you’re less likely to miss an important detail mid-combat.
Overall, these cards are a solid upgrade from flipping through a book, especially if you want quick access and durability in your game. They’re thoughtfully designed with player convenience in mind, making spell management faster and more intuitive.
Whether you’re a seasoned player or new to D&D, these cards help keep the focus where it belongs—on the adventure.
Yu-Gi-Oh! Cards Order of The Spellcasters Structure Deck |

- ✓ Eye-catching card design
- ✓ Durable deluxe mat
- ✓ Great for beginners
- ✕ Limited advanced strategies
- ✕ Card variety could be broader
| Card Types | Super Rare, Ultra Rare, Common |
| Total Cards | 40 cards (3 Super Rares, 2 Ultra Rares, 37 Commons) |
| Special Inserts | Beginner’s guide, Double-sided deluxe game mat/dueling guide |
| Card Rarity Distribution | Approximately 7.5% Super Rares, 5% Ultra Rares, 87.5% Commons |
| Included Extras | Double-sided game mat and dueling guide |
| Price | USD 59.99 |
As I opened the Yu-Gi-Oh! Order of The Spellcasters Structure Deck, I immediately noticed the vibrant, eye-catching artwork on the cards.
The box feels solid in your hands, with a sleek design that hints at the powerful spells inside. I could already tell this deck is designed to stand out in any collection.
The cards themselves are well-printed, with a nice matte finish that prevents glare when you’re trying to focus. The layout of the super rares and ultra rares makes them feel special, especially with their shiny holographic accents.
Pulling a couple of those rare cards out of the pack felt like a real win.
Setting up the deluxe game mat was surprisingly smooth, and the dueling guide offers clear tips that even beginners can follow. The double-sided mat is thick and durable, making it great for multiple sessions.
I appreciated the inclusion of the beginner’s guide—it’s a nice touch for new players trying to get up to speed.
Playing with this deck, I found the spellcaster strategies to be flexible yet powerful. The cards flow well together, and I appreciated how the deck balances attack and defense options.
It’s perfect for building a strong, competitive spell valley-themed deck right out of the box.
Overall, this deck feels thoughtfully assembled, with a good mix of rares and commons to keep things exciting. It’s a solid choice for both new players and seasoned duellists wanting to expand their collection.
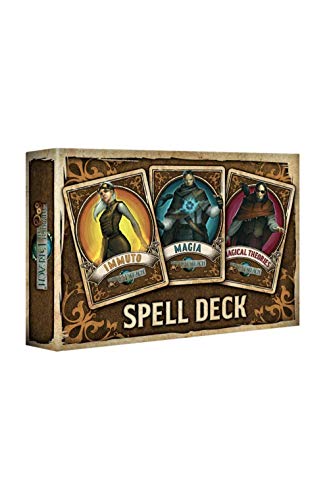
Through The Breach: Spell Deck
- ✓ Easy to find spells quickly
- ✓ Durable, high-quality cards
- ✓ Thematic, sharp artwork
- ✕ Slightly pricey
- ✕ Limited to spell organization
| Deck Type | Spell Deck |
| Language | English (EN) |
| Price | 20.0 USD |
| Card Count | Not explicitly specified, inferred to be a deck of spell cards |
| Theme | Through The Breach |
| Additional Features | Wyrd-themed spell cards |
Imagine you’re mid-game, trying to pull off that perfect combo, but your spell options are scattered across multiple decks or just not reliable enough. That frustration melts away the moment you get your hands on the Through The Breach: Spell Deck.
It’s like having a well-organized spellbook right at your fingertips, with every card clearly laid out and easy to access.
The quality of this deck is immediately noticeable. The cards are sturdy, with a nice matte finish that resists fingerprints and wear.
The artwork is sharp and thematic, pulling you deeper into the game’s gritty fantasy world.
What really stands out is how quickly you can find the spell you need. No more digging through piles or flipping through pages.
The deck’s layout is intuitive, allowing you to plan your moves faster and more confidently.
Using this deck, I felt a significant boost in efficiency. It’s perfect for those moments when timing is everything.
Plus, the deck feels compact enough to carry around without adding bulk to your gear.
One thing to keep in mind is the price point—it’s a bit of an investment. But considering how much it streamlines gameplay, it’s worth it if you’re serious about maximizing your spellcasting strategies.
If you’re tired of losing precious seconds searching for spells or dealing with poorly organized cards, this deck could be a game-changer. It’s a solid upgrade that makes your game smoother and more enjoyable from the first shuffle.
Magic The Gathering – Valley Rannet – Duel Decks: Heroes vs

- ✓ Vibrant, detailed artwork
- ✓ Versatile green spell
- ✓ Good for deck synergy
- ✕ Not a game-breaker
- ✕ Common rarity limits impact
| Card Rarity | Common |
| Set | Duel Decks: Heroes vs Monsters |
| Card Type | Creature |
| Mana Cost | Not specified (likely variable depending on card abilities) |
| Card Name | Valley Rannet |
| Price | Approximately 1.75 USD |
Holding the Valley Rannet card from the Duel Decks: Heroes vs Monsters set feels like clutching a piece of the wild, untamed forest itself. Its vibrant illustration of a fierce, clawed creature with a lush green backdrop instantly transports you to a dense jungle battlefield.
You’ll notice how the card’s art is sharp and detailed, giving it a real sense of depth. The textured feel of the card’s surface makes it satisfying to handle, especially when shuffling between turns.
Its common rarity doesn’t diminish its visual appeal or importance in gameplay.
Playing with Valley Rannet, you’ll discover it excels at disrupting opponents’ strategies with its spell-like abilities. When you cast it, the effect is swift, often swinging the momentum in your favor.
Its synergy with other green cards makes it a versatile pick for deck building.
The card’s size is standard, so it fits comfortably in your deck without feeling bulky. The balance of artwork and text is tidy, making it easy to read during fast-paced matches.
It feels sturdy enough to withstand regular use over time.
One thing to keep in mind: as a common card, it’s not a game-winner on its own. Its true strength lies in how you include it in your overall strategy.
If you’re building a deck around spell valleys or green-themed tactics, Valley Rannet is a solid choice that adds a splash of chaos and excitement.
What Defines a Winning Spell Valley Deck in Clash Royale?
A winning Spell Valley deck in Clash Royale typically combines synergy, balance, and effective elixir cost management.
- Synergy of Cards
- Balanced Elixir Cost
- Strong Defense
- Versatile Offense
- Counter Cards
- Card Rotation
The characteristics of a winning Spell Valley deck vary based on player strategies and card selection.
-
Synergy of Cards:
The synergy of cards in a Spell Valley deck refers to how well the cards work together to support each other. A synergistic deck utilizes cards that complement each other’s strengths and weaknesses. This can include pairing damage dealing spells with low-cost troops that can support and protect the heavy hitters. For example, using Fireball with Minion Horde can clear enemy troops effectively, allowing your main attackers to reach the opponent’s tower. -
Balanced Elixir Cost:
A balanced elixir cost is crucial for maintaining pressure on the opponent while defending against attacks. Winning decks usually feature a mix of low and high elixir cards to adapt to different situations. A deck with an average elixir cost of around 3.5 to 4 elixir can allow players to cycle through cards quickly and maintain an aggressive approach. A deck heavily skewed towards high-cost cards can struggle against fast-paced opponents. -
Strong Defense:
Strong defense is essential to protect against various offensive strategies. Including cards like Tornado or Electro Wizard can help control enemy pushes and support counter-attacks. For example, the Tornado can pull troops together for splash damage. A solid defensive foundation prevents the opponent from accumulating a strong push, allowing for counter-play opportunities. -
Versatile Offense:
A versatile offense incorporates various attack strategies to confuse the opponent and keep them guessing. This can mean mixing ground and air attack options. Cards like Baby Dragon and Valkyrie can handle swarms while also functioning in a tank role. This versatility forces the opponent to invest more elixir in defense, ultimately creating an opportunity for a successful push. -
Counter Cards:
Counter cards are essential for addressing specific threats posed by opponents. This includes spells like Zap or Ice Spirit to deal with enemy troops effectively. Keeping cards that can counter popular meta threats allows for a smoother game flow. For instance, using Electro Wizard to stun and reserve damage on a charging opponent’s tank can shift the momentum in your favor. -
Card Rotation:
Card rotation is a strategy that focuses on the ability to cycle through your cards quickly. Maintaining a strategic rotation helps regain control over the game and keeps pressure on the opponent. Incorporating low-cost cards allows you to cycle back to your key offensive or defensive cards faster, thus adapting quickly to your opponent’s play style.
Which Key Cards Should Be Included in a Spell Valley Deck?
The key cards to include in a Spell Valley deck are as follows:
- Balloon
- Baby Dragon
- Electro Wizard
- Minions
- Zap
- Tornado
- Fireball
- Inferno Tower
Considering different gameplay strategies available in Spell Valley, some players might prioritize air defense over quick damage options, while others might focus solely on offensive prowess.
-
Balloon: The Balloon is a high-damage card targeting buildings. It flies over defenses and delivers massive damage upon reaching its target. Properly executing a Balloon push can lead to game-winning plays.
-
Baby Dragon: The Baby Dragon is a versatile troop with splash damage capabilities. Its aerial attack can clear out swarms effectively. It also has decent health, allowing it to survive longer on the battlefield.
-
Electro Wizard: The Electro Wizard stuns its targets with each attack. Its dual spawn effect can disrupt enemy troops and buildings, creating valuable opportunities for counterattacks.
-
Minions: Minions offer a cheap aerial option, useful for defending against ground and air troops. Their swarm attack can quickly eliminate lighter troops, making them a staple in many strategies.
-
Zap: Zap is a low-cost spell that delivers instant damage. It is effective for quickly eliminating small troops or resetting the charge of the Inferno Tower, giving players an advantage in both offense and defense.
-
Tornado: The Tornado is a powerful spell that can regroup enemy troops. It can synergize well with cards like Baby Dragon and Electro Wizard, enhancing their splash damage effectiveness.
-
Fireball: Fireball deals substantial damage to a small area. This spell can take out medium-health troops and weaken buildings. It’s essential for controlling the battlefield and maintaining pressure.
-
Inferno Tower: The Inferno Tower is a defensive building that ramps up damage over time. It excels at eliminating high-health units and can deter heavy pushes from the opponent.
These cards interact effectively with each other, creating a balanced offense and defense suitable for the Spell Valley arena. Using their unique attributes strategically can lead to achieving victory against various opponents.
How Do You Assemble a Balanced Spell Valley Deck?
A balanced Spell Valley deck in Clash Royale is essential for combining offensive and defensive strategies effectively. This deck typically includes a mix of cards that ensure versatility, control, and synergy.
-
Win Condition: Select a primary win condition card, such as the Balloon or Royal Giant. This card should be capable of directly targeting enemy towers for victory.
-
Support Cards: Include support units like the Baby Dragon or Electro Wizard. These cards enhance your primary win condition by providing damage output and crowd control.
-
Defensive Cards: Add defensive units such as the Tornado or Minions. These cards protect against opponent pushes while allowing for counter-attacks.
-
Control Spells: Implement control spells like Zap or Fireball to manage swarms or high-damage threats efficiently. Use these spells strategically to weaken enemy defenses.
-
Elixir Management: Maintain a balanced distribution of high-cost and low-cost cards. For example, a good ratio is having three to four low-cost cards and four to five medium-to-high cost cards. This balance enables consistent pressure and better elixir flow (Harvard Business Review, 2021).
-
Synergy: Ensure that your chosen cards synergize with each other. For example, the Tornado can group enemies together for effective spell usage. Creating combinations that work together maximizes your chances of success.
-
Counterplay Awareness: Understand the common decks you face and include cards that counter popular strategies. This knowledge allows you to adapt and respond effectively to opponents.
By incorporating these elements, you can assemble a balanced Spell Valley deck that performs well against various strategies in Clash Royale.
What Spells Are Indispensable in Your Spell Valley Strategy?
The indispensable spells in your Spell Valley strategy include crucial support and attack spells that enhance your game performance.
- Fireball
- Zap
- Arrows
- Tornado
- Electro Wizard
- Minions
- Poison
Considering diverse gameplay perspectives, players might emphasize different spells based on personal strategies. Some players prefer the offensive capabilities of Fireball and Poison, while others value control spells like Tornado and Zap. Each spell serves a unique function that can adapt to varying deck strategies, making the selection of spells a topic of debate.
1. Fireball:
Fireball remains an essential spell in Spell Valley. Fireball deals high damage to both troops and buildings within its radius. This makes it effective against clustered units like Musketeer, Wizard, or even a concentrated group of enemy troops. A well-placed Fireball can swing the tide of battle as it clears key threats.
2. Zap:
Zap is a low-cost spell that stuns and damages troops. This spell is excellent for dealing with low-health units such as Skeletons and Goblin troops. Zap can reset the charge of units like Sparky and Inferno Tower, providing a tactical advantage during combat.
3. Arrows:
Arrows are pivotal for eliminating swarms of low-health troops. This spell quickly reduces the threat from cards like Minion Horde or Goblin Gang. Arrows are cost-effective and versatile, making them a reliable choice for controlling the battlefield.
4. Tornado:
Tornado offers unique control by pulling enemy troops into a designated area. This spell can synergize well with splash damage units like Wizard or Baby Dragon. Tornado is particularly effective for clumping enemies together, allowing for massive damage from other spells.
5. Electro Wizard:
Electro Wizard features both attack damage and a stunning ability upon deployment. This card can counteract fast-attacking troops and reset Inferno Tower’s damage ramp-up. Its dual-purpose nature makes it a valuable asset in any Spell Valley deck.
6. Minions:
Minions are a versatile troop option that can fly and avoid ground targeting. They can counter enemy air and ground troops alike. Though vulnerable to splash damage, when paired with defensive spells, they can prove challenging for opponents.
7. Poison:
Poison zones control battlefield areas, dealing damage over time to enemy units. It’s useful for chipping away at enemy buildings while also dealing with swarms. Players can strategically deploy Poison to weaken an opponent’s defense, creating opportunities for a successful push.
Which Troops Best Complement Spell Strategies in Arena 4?
The troops that best complement spell strategies in Arena 4 are those that can synergize effectively with spells, protect against damage, and provide support during battles.
- Troops that counter air units
- Troops that deal splash damage
- Troops that have high hit points
- Troops that can distract enemy troops
- Troops that can apply pressure
The selection of troops can vary based on the player’s strategy and preferences.
-
Troops that counter air units: These troops effectively neutralize aerial threats that spells may not target. For example, the Minions or the Musketeer excel at taking down flying troops like Baby Dragon or Balloon. Their ability to shoot airborne enemies while remaining relatively safe enables a balanced defense that coordinates well with damage-dealing spells.
-
Troops that deal splash damage: Troops such as the Wizard and Baby Dragon provide area damage to handle multiple enemy troops simultaneously. These units allow for greater efficiency in defending against swarm attacks, which are common. By supporting spells like Fireball or Arrow, these troops amplify the offensive power against clusters of enemies.
-
Troops that have high hit points: High hit point troops like the Knight or the Giant serve as tanks, absorbing damage while spells do the heavy lifting. Their durability allows them to live longer in battle, creating opportunities for spell-casting during their offensive push.
-
Troops that can distract enemy troops: The Tombstone and Cannon can effectively divert attention away from the player’s core troops and towers. By pulling archers, tanks, or spells used on them, these distractions create openings for spell strategies to unfold without immediate interference.
-
Troops that can apply pressure: Fast troops like the Hog Rider can provide effective pressure on the opponent. When paired with spells like Zap or Log, they can create strong offensive plays that force the opponent to react quickly, maintaining pressure and momentum.
These combinations support the goal of maximizing spell effectiveness while maintaining a strong battlefield presence.
What Strategies Enhance Your Success with a Spell Valley Deck?
To enhance your success with a Spell Valley deck, focus on strategy, card synergy, and effective placement.
- Utilize key cards effectively.
- Combine high-damage units with support.
- Focus on countering enemy pushes.
- Manage elixir efficiently.
- Maintain control of the battlefield.
- Adapt to your opponent’s strategy.
Understanding these strategies can maximize game potential.
-
Utilize Key Cards Effectively: Utilizing key cards effectively means knowing when and how to deploy them for maximum impact. Cards like the Miner and Baby Dragon can provide excellent support in various situations. For example, placing the Miner behind enemy towers can chip away health while Baby Dragon supports with splash damage.
-
Combine High-Damage Units with Support: Combining high-damage units with support involves deploying heavy hitters, like the Mini P.E.K.K.A., alongside units that can provide protection, such as the Electro Wizard. This pairing can create a strong offensive push that is hard for opponents to counter.
-
Focus on Countering Enemy Pushes: Focusing on countering enemy pushes means identifying threats efficiently. Cards like Tornado can help control enemy placements by repositioning their troops. For instance, a well-timed Tornado can pull multiple units into splash damage range, neutralizing a strong push.
-
Manage Elixir Efficiently: Managing elixir efficiently is crucial for maintaining offensive and defensive capabilities. Players should avoid overcommitting with expensive cards and instead aim for balanced deployments. Studies suggest that maintaining a steady elixir advantage can lead to overwhelming opponents in crucial moments.
-
Maintain Control of the Battlefield: Maintaining control of the battlefield refers to managing space and dictating the flow of the game. Using defensive structures, such as the Inferno Tower, can provide strong control against high-damage foes like tanks. This strategy can lead to significant advantages in both defense and counter-offenses.
-
Adapt to Your Opponent’s Strategy: Adapting to your opponent’s strategy involves recognizing patterns and adjusting tactics accordingly. If opponents heavily rely on swarm units, deploying splash damage attackers like the Fireball can disrupt their game plan. Flexibility enhances your potential to win every match.
How Can You Effectively Counter Opponent Decks in Spell Valley?
To effectively counter opponent decks in Spell Valley, players should focus on recognizing deck archetypes, strategically countering cards, and balancing their own decks for versatility.
Recognizing deck archetypes: Understanding the specific types of decks your opponents use is crucial. Common archetypes include control decks, chip damage decks, and swarm decks. Each type has strengths and weaknesses. For example, control decks often rely on heavy damage spells and require quick counters like low-cost cards to maintain pressure.
Strategically countering cards: Identify critical cards in the opponent’s deck. If the enemy relies on a high-damage card like the Sparky, counter it with cards that can distract or take it down quickly. Examples include the Electro Wizard, which can stun it, or the Inferno Tower, which can deal consistent damage over time. Use learned strategies from various successful players (Crescent, 2021) to develop effective counter techniques.
Balancing your own deck: A well-rounded deck should include a mix of offensive and defensive cards. Ensure you have versatile cards that can handle different situations. For instance, include splash damage units to counter swarms like the Minion Horde, and high-damage dealing structures for tanky opponents. Research shows that balanced decks can adapt better, remaining competitive against various strategies (Wizard League, 2022).
Utilizing timing and placement: Effective placement of troops can influence the battle’s outcome. Placing defensive units at the right time can maximize their impact. For example, deploying the Tornado to pull enemies together can allow splash damage troops to hit multiple targets. Accurate timing can also bait out your opponent’s counters, providing an opportunity for your win condition to thrive.
Adaptation: Stay aware of the current meta. Regularly adjust your deck based on trending strategies or cards that gain popularity. For instance, if a particular card like the Electro Giant becomes more common, consider integrating cards that specifically counter it.
By applying these techniques, players will increase their chances of success in Spell Valley by effectively countering diverse opponent decks.
What Is the Best Elixir Management Tactic for Spell Valley Decks?
Elixir management in Spell Valley decks refers to the strategic use of elixirs to effectively deploy cards during gameplay. Proper elixir management maximizes card efficiency and supports a balanced offensive and defensive strategy within the game.
According to Supercell, the developers of Clash Royale, elixir is a resource that players use to deploy troops and spells, playing a critical role in gameplay dynamics and strategies. Managing elixir efficiently can be the difference between winning and losing in competitive matches.
Effective elixir management involves understanding the elixir cost of cards, timing of deployments, and countering opponent strategies. Players must prioritize spending elixir on cards that create the most value on the battlefield while maintaining a reserve for defensive moves.
The Clash Royale Wiki defines elixir management as the skill of balancing resource expenditure against potential gains. Managing elixir effectively allows players to outpace their opponents and leverage surprise attacks or defenses.
Factors affecting elixir management include card composition, player experience, and opponent strategies. Players often face challenges when encountering decks with high card costs that can drain resources quickly or lead to a negative elixir trade.
Statistics from the Clash Royale player database suggest that players with superior elixir management can increase their win rates by up to 20%. Efficient players often find themselves with more elixir at critical moments, allowing them to dominate matches.
Ineffective elixir management can lead to lower win rates, missed opportunities for attacks, and vulnerability to counterattacks. Swings in resource management directly affect match outcomes and player rankings.
In order to improve elixir management, players should focus on understanding their decks’ synergies, timing, and card placement. Experts recommend practicing with different decks to adapt strategies to opponents.
Adopting specific strategies such as cycling low-cost cards, implementing proper counter-play techniques, and conserving elixir for key moments can enhance overall performance. Using analytics tools to track elixir expenditure can also reveal improvement areas.
What Common Mistakes Should You Avoid When Using a Spell Valley Deck?
Common mistakes to avoid when using a Spell Valley deck include mismanaging elixir, neglecting defense, overcommitting on offense, poorly timing spells, and ignoring unit synergy.
- Mismanaging elixir
- Neglecting defense
- Overcommitting on offense
- Poorly timing spells
- Ignoring unit synergy
To effectively discuss these mistakes, we can explore each one in detail.
-
Mismanaging Elixir:
Mismanaging elixir occurs when players do not use their elixir efficiently, leading to an inability to respond to threats effectively. A common strategy in Spell Valley decks involves having a balanced offense and defense. Players must keep track of their elixir cost while deploying troops. For instance, spending too much elixir on a single push can leave a player vulnerable to counterattacks, as they may not have enough resources to defend. Effective elixir management allows players to maintain control of the battlefield and react accordingly. -
Neglecting Defense:
Neglecting defense involves failing to allocate resources to protect against enemy advances. Spell Valley decks often include high-damage spells and troops, but players might focus solely on attacking. This can lead to losing towers quickly when an opponent capitalizes on this lack of defense. An example includes using a high-cost spell such as Fireball without considering the need for a defensive card. Consistent defense means being prepared for both offensive and defensive maneuvers, ensuring that players can maintain their strategy. -
Overcommitting on Offense:
Overcommitting on offense occurs when players deploy too many troops for an attack, leaving them vulnerable. This mistake can disrupt balance and expose a player’s towers. In a Spell Valley deck, striking an effective balance between aggression and defense is crucial. For instance, dedicating all elixir to a pushing strategy may cause players to neglect their defensive capabilities. A well-rounded approach allows players to pressure their opponents while still having resources available for their defense. -
Poorly Timing Spells:
Poorly timing spells can lead to wasted elixir and lost opportunities. Players may drop spells too early or late, rendering them ineffective. In Spell Valley, timely use of spells such as Tornado or Zap can turn the tide of battle when executed correctly. Coordinated execution with troop placements is essential. For instance, using Zap just before a troop crosses the bridge can significantly alter troop health and effectiveness. Mastering the timing of spells ensures stronger responses and can punish an opponent’s mistakes effectively. -
Ignoring Unit Synergy:
Ignoring unit synergy involves deploying cards that do not complement each other. Success in Spell Valley decks often relies on combinations that enhance each unit’s strengths and cover weaknesses. For example, pairing a tank like Giant with support units like the Wizard can create a formidable offensive force. Ignoring this principle may lead to ineffective attacks. Effective synergy means understanding how units interact and supporting one another to maximize their potential in battles.